
A dryer vent is a tube, usually made of aluminum or plastic, that carries moist air outside from your clothes dryer to the outside. Making sure the vent is clean and unobstructed will help ensure your clothes dryer operates efficiently and safely. It may be necessary to upgrade an older existing metal dryer vent because it will corrode over time and become clogged with lint.
Dryer Vent Upkeep
A common reason for a breakdown in home appliances like the washing machine and clothes dryer is due to improperly maintained vents and pipes. When doing routine checks on these appliances
Dirty dryer vents are sources of fire hazards in homes. They also lead to a waste of time as they take longer to dry clothes, consume a lot of energy and money, and break their mechanical parts. To avoid these problems, you need to carry out a dryer vent cleaning Toronto.
If you notice your dryer is not performing as it should, you should look at its vent. Every time you dry clothes, lint is left on the vent and blocks it. This reduces air circulation, causing the dryer to overheat. Lint is very flammable, and a fire can occur due to overheating. Cleaning a dryer vent is simple, and you can DIY. These steps will guide you. Click here to learn more.
Locate The Duct
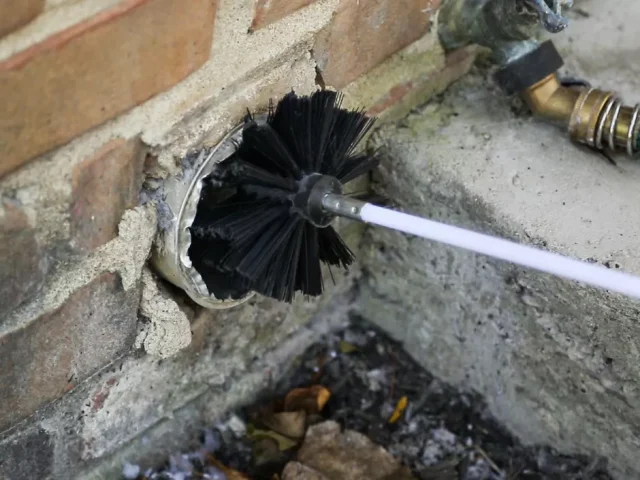
The first thing is to find where your duct starts and ends. In most dryers, the pipe is attached at the back of the dryer and is fixed at the end of a wall. This allows the vent to deposit hot air outside and allow cool air in the dryer for well-functioning. On the outside, the dryer remains closed to keep animals away and opens only when it lets hot air out.
If you have a plug-in dryer, the pipe starts from the back of your dryer and sticks out of a wall. You can easily find where it is by tracing it. If you have a stackable washer and dryer, remove one side of your washer to see if there’s a hole in the wall for the dryer duct. If you cannot find the hole, push your dryer away from the wall to see which side has no wires. All dryers have two sides where the wire is present and two where it isn’t. The one with no wire contains the vent hole.
Check the Buckle
After you locate where your vent is, check to see if it is open or closed. If the buckle is closed, you need to fix it before cleaning your dryer vent. Closing the hole keeps animals and bugs from crawling in and fires from forming outside. It also protects children and pets from getting inside while you clean the vent.
Open The Buckle
To open a buckle, remove its screws using a screwdriver, then cut off the metal around it using utility scissors. Once this area is visible, use pliers to pull out all accumulated lint and gunk inside. Cut off any extra metal that may be forcing the duct to close with electric shears. Also check for animal nests attached to the duct because they can block airflow leading toating of your machine.
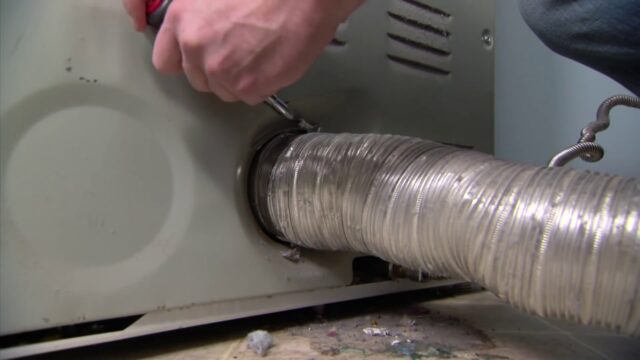
Take The Vent Off
To access the vent, you will need to remove it from your dryer. Oftentimes this is as simple as just pulling off the hose and taking out its screws. At times though, there may be other things obstructing the process such as a washer or other dryers nearby. For example, if you have two laundry machines side by side and they share a wall, the other machine’s duct may block yours. If so, remove it first before removing your own vent. Clean any dirt or lint in this area with a vacuum cleaner before moving on with repairs.
Cut Out Lint With Hacksaw
A clogged duct can lead to overheating problems so cutting out lint is crucial. To do this, insert a saw at the end of your vent and cut any bits that are blocking airflow. Since dryer vents have many curves and turns, you may not be able to see everything that is blocked even if you can clearly feel it. Make sure to clean all areas visible or invisible.
Push The Vent Back

Before putting back your vent, you need to ensure the area around it has been cleared completely. Use a brush attached to an electric drill and vacuum cleaner for efficient cleaning and drying respectively. After making sure there’s no dirt around the duct, put back its screws then push it back to its position.
Close The Buckle & Test Your Machine
Once you’ve cleaned, replaced any parts as needed, and pushed the vent back on, close its buckle and test your machine.
Don’t neglect a lint-clogged dryer vent because it leads to air circulation problems. If you have a plug-in dryer
Tidy Up

Once you are done with the dryer vent cleaning, clean all the lint around and any dust to prevent it from getting back into the system. Also, clean the top of the dryer. When everything is okay, return the parts of the dryer. Put back the vent and clamp it back into position.
Test The Dryer
Return the machine into its position and plug in the power supply back. Switch the dryer on to see if it is running perfectly. Test it with small amounts of clothes. Check if the drying time has been shortened and if the dryer is overheating. Also, monitor the energy consumption.
When To Call A Professional

In case you encounter something that you cannot handle during dryer vent cleaning, you should call an expert dryer vent cleaner to take care of that. Professionals know
Conclusion
Dryer vents need special attention to keep your house safe from fires and other problems. Cleaning your dryer vent regularly is a great way to keep appliances and house clean. Doing this annually will make everything work more effectively.


")


