
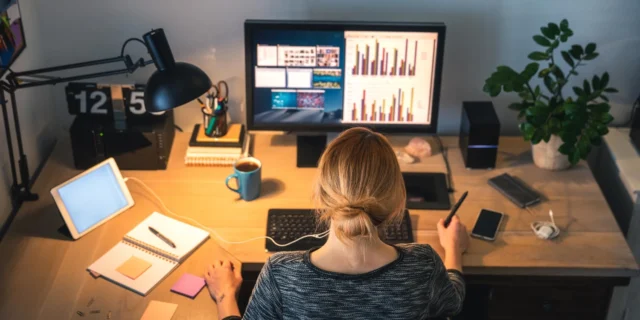
One saying that you can often hear is that “A picture is worth a thousand words,” and this couldn’t be more true, especially today when all that’s needed to make a perfect photo is a bit of timing and a good quality camera, which most people have on their phones. On the other hand, an image on a phone or a PC is one thing, but it’s an entirely different thing when it is printed, framed, and placed on a wall, as only then can you really in enjoy it in all its colors and glory. Of course, the preparation and printing process is also much different, but that doesn’t mean that it is complicated too, and these five steps will help you with that.
1. Check the monitor settings
The first thing we should do before even start preparing the image for printing is to check monitor settings, as in most cases, we do not perform calibration often, and it should be done if we want to get a high-quality photo. The reason for that is pretty simple – if we do not perform the monitor calibration, the image on the screen and the printed one will surely differ a lot in colors and clearness. Regarding that, we can spend hours editing photos and end up with a printed version that looks nothing like the one we saw while working on it. Calibration is much simpler than it looks, and all we need to do is set all the things to look exactly like those that we will get from our printer.
We do not need a professional to do that instead of us, as we simply should open the settings and do it on our own. Now, even though this might seem or sound complicated, the entire process is actually pretty simple, as all that’s needed is a few clicks and reviewing the details and how well-balanced the shades are. Of course, there are also a few tricks and tools that can be of great help here, as they can help you get more details.
2. Don’t forget about size
One of the most common mistakes people make is not saving a photo in the size in which it should be printed, which results in getting a photo that is not clear enough. Since it is a simple step that is often forgotten, keep in mind that it is necessary to save it in the right size after editing, or you can end up with a bad version of it thanks to a little mistake that could be skipped. There are a few standard sizes that we can choose from regarding how big it should be, but be careful if it needs to be enlarged since it will need more editing before the printing. Once again, this is a basic thing that those with some experience in printing images are well aware of, but for those new to this, enlargening can be a bit difficult and more complex task. If this is what troubles you, and especially in situations where you deal with larger photos, make sure to have the right tools installed so that you can easier go through the entire procedure.
3. Crop it
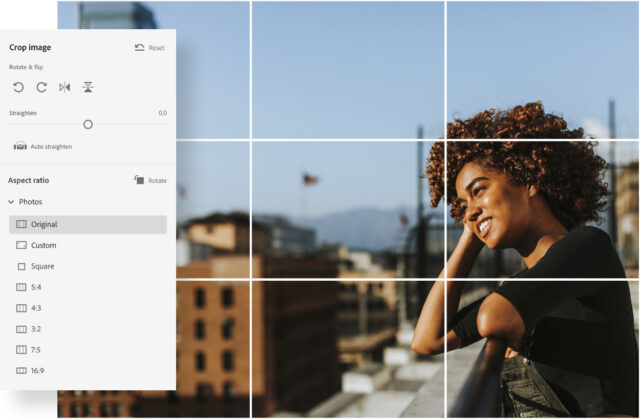
Okay, cropping as a term can fall into the check the size category, but here, it’s much more than just that, which is why it has a separate role here. Most images need to be cropped when edited as it is pretty challenging to create the one that should contain literally everything that is seen on it when printed. We can use various programs and tools to do it and choose between standard sizes or doing it manually. Cropping it to the desired size is not the same as saving it, so make sure to do both steps in order to get one that would look as you wish. The devil is in the details, and this saying couldn’t be more true when it comes to printing images, as the more thorough the work, the better the outcome, and cropping can be of great help.
4. Get more clarity
Photos on our phone or PC can look great, but if we want to post them on a website or print them, they need to be sharpened in order to get the best clarity. Photos we want to prepare for posting online don’t need so much work, but when it comes to printing, the situation changes and is much different. It is difficult to say how much sharpening it will need since this can vary from one image to another, but in most cases, photos with a lot of details will need to be sharpened more than ones without them, or these small details will not be as clear as they should. Luckily, it can be done with many simple tools, and most of them will offer automatic sharpening, which is great for beginners as they do not need to worry whether they have overdone it or not.
5. Pick the right file format

Now, this is something that most people struggle with, as they tend to go with the easiest and fastest possible solution, which is never a good idea when you have so many details to check and worry about. The right file format is an essential step, as everything else, even though significant, will be for nothing if you don’t pick the right file format. Every print lab uses different programs, software, and techniques, and if you plan to edit photos and just use these labs for printing, it’s highly advised to check with them which file format they prefer, but in most cases, it’s SRGB and Adobe RGB. Another crucial step you shouldn’t overlook is picking the right paper, as this too can affect the overall look of the image once it’s printed. One of the best and most commonly used is the Matte paper prints, as it provides an exceptional, professional finish, and you can find out all about that and more at posterprintshop.com.


